Read on to learn how to setup Windows Live Writer to post your blog or content articles to your Joomla CMS site.

Whether you want to add blogging functionality to your Joomla site or simply want a better way to post content articles, Windows Live Writer (WLW) is a must. Without going into detail about WLW’s many features, simply being able to publish content, replete with images, tags and compatible formatting, to your site directly from your Desktop is the only way to go.
Of course, to get WLW to work with your Joomla site requires completing a few simple steps.
- Before we download and install WLW, we need to ready our Joomla site to be able to communicate with WLW. To begin, you need to download and install the MetaWeblog API Plugin. You can download it here: MetaWeblog API 0.9
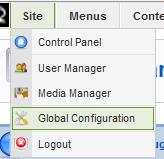
- Log into your Joomla site Administrator backend.
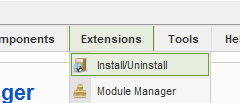
5.From the menu, select “Extensions>Install/Uninstall”.

7.Select the “metaweblog.zip” file and click “Open”.

8.Finally, click the “Upload File & Install” button.

9.Once installed, go to “Extensions>Plugin manager”.

10.In the “Filter” field, type “metaweb” and click “Go” to display your new plugin. Click on the plugin name “XML-RPC – metaWeblog API” to configure.

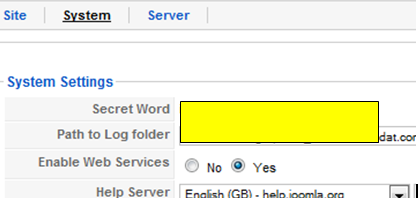
11.From the “Enabled” field, click the “Yes” radio button to activate the plugin. Select a default category from the “Default category” drop down list. Personally, I use hr (horizontal rule) as a read more separator. I also prefer not to post articles directly to the front page as I like to tweak them a bit once they are posted before pushing them to the front page. Of course, select the options that suit your needs. Once done, click the “Save” button.

12.Now, we need to download and install Windows Live Writer. If you already have WLW installed, skip to the next step. To download WLW, click here: Windows Live Writer . Live Writer is part of the Windows Live Essentials Package. Simply check which Windows Live applications you wish to install – in this case Windows Live Writer.
13.Once installed, we need to run and configure WLW to communicate with our Joomla site. To launch WLW from the Start Menu, click “Start>Programs>Windows Live>Windows Live Writer”.

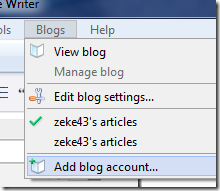
14.From the menu, select “Blogs>Add blog account…”
15.From the first windows, select “Other Blog service” and click “Next”.

16.In this next window, type in your website’s address as well as the username and password you use to log into your website. Click “Next”

17.From the “Select blog Type” window, select “MetaWeblog API” from the drop down list.

18.In the “Remote posting URL for your blog” field type your website’s address in the section and add “/xmlrpc/index.php”. It should look exactly like the following except with your site’s address instead of “dodisdodat.com”. Click “Next”.

19.If all of your information is correct and you have followed the steps in this tutorial, Windows Live Writer should connect to your site and download your categories and themes.

20.You can provide a nickname for your blog and you have the option of sharing your blog updates via your Windows Live account. Click “Finish”.

For all intents and purposes, you should be ready to write and publish your first blog or article. One issue I ran into is that articles with large or numerous images would return a MetaWeblog API error (see - Movable Type API Error - response to the metaWeblog.newPost method received from the blog server was invalid). At first , I thought this error was caused by conflicting extensions in my Joomla installation. However, I’ve since discovered my issue was related to the number and size of images. To solve this issue, I have configured WLW to upload my pictures via FTP rather than HTTP.
To configure your WLW to upload via FTP, you will need to create an FTP account from your host’s Cpanel. With your FTP account information, from your WLW menu, select “Blogs>Edit blog settings”

From the “Edit Blog Settings” window, click Pictures. Select “Upload pictures to an FTP server” and click “Configure FTP”.

Type in your FTP hostname (where your site is hosted), username and password. Select which folder on your server to store images in and type in the address (URL) that points to that folder via your web address. Click OK.

There you have it!
Thanks for reading!
No comments:
Post a Comment